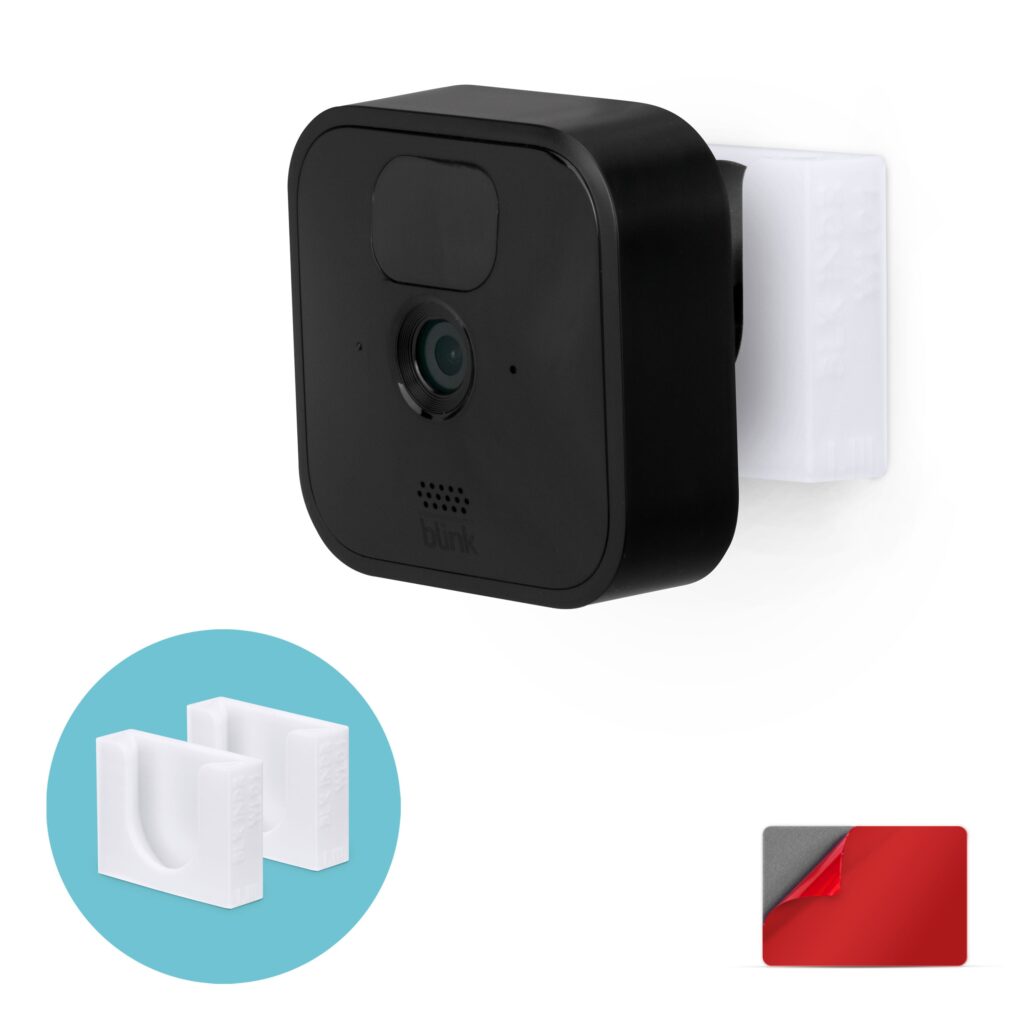
Do you know how to install blink outdoor camera without screws? If not, then just follow this guide: Use the adjustable mount that comes in the box. The mount uses a sturdy adhesive to attach to surfaces.
Blink outdoor camera is a great security device that can be used to monitor your property. It is easy to install and doesn’t require screws, making it a cost-effective solution. The camera is designed to withstand harsh weather conditions and has a long battery life.
With the adjustable mount, you can secure the camera to almost any surface. The adhesive used in the mount is strong enough to hold the camera in place for extended periods. This makes the installation process quick and hassle-free. In this article, we will guide you through the steps involved in installing the blink outdoor camera without screws.

Credit: www.youtube.com
Understanding Your Blink Outdoor Camera
Parts Of The Blink Outdoor Camera Kit
Upon purchasing a blink outdoor camera, you’ll receive a kit that includes the following parts:
- The blink outdoor camera unit
- Two aa lithium batteries
- A mount kit which includes a bracket and screw anchors
- A sync module
- A usb cable
Before proceeding with the installation process, make sure that you have all of these parts and they are unscathed.
Understanding The Blink App And Camera Settings
Blink outdoor camera comes with an easy-to-use app that allows you to control and manage the device. The app can be downloaded for free on any mobile device, including smartphones and tablets. After downloading the app, you’ll need to create an account and sync your camera unit with your account.
Follow these steps to understand the blink app and camera settings:
- Go to your app store and download the blink app
- Create a blink account or log in to your existing account
- Click ‘add a device’.
- Follow the instructions to set up your blink outdoor camera and sync module.
- Once you’ve successfully added the camera, you can start exploring various settings options.
You can customize the camera settings according to your preference such as how long the camera records footage, motion detection sensitivity, and battery conservation mode. Make sure to familiarize yourself with all the settings to optimize your blink outdoor camera experience.
Best Practices For Positioning Your Blink Outdoor Camera
Proper placement of your blink outdoor camera is essential for capturing the best footage. Here are some best practices for positioning your camera:
- Place the blink outdoor camera about six feet off the ground for optimal coverage.
- Choose a location with good wi-fi connectivity.
- Avoid pointing the camera towards direct sunlight or other sources of glare.
- Make sure that the camera is aimed at a wide enough angle to capture the activity you want to view.
- If you’re using multiple cameras, be sure to place them in areas that cover different parts of your property for full coverage.
By following these best practices for positioning your blink outdoor camera, you’ll optimize your camera’s functionality and capture quality footage.
Preparing For Installation
Blink outdoor camera is an excellent choice for keeping a watchful eye on your property, and it’s very easy to install. Unlike traditional security cameras, which require screws to mount, the blink outdoor camera can be installed effortlessly without any screws.
This blog post will guide you through the process of installing the blink outdoor camera without screws with ease. Before you get started with the installation process, there are a few things you should prepare yourself.
Check Your Wi-Fi Connection Strength
As you intend to install the blink outdoor camera, the first thing you need to ensure is a stable and strong internet connection. Always check the wi-fi signal strength around the location where you want to install the camera. This step is vital as a weak or unreliable wi-fi connection can lead to a shaky connection and poor image quality.
Therefore, it is recommended to have at least a 2 mbps upload speed and a good signal strength.
Ensure Your Smartphone Or Tablet Is Fully Charged
The next step is to ensure that your smartphone or tablet is charged fully and ready to be used. Having a fully charged device will save you from the hassle of the device running out of power midway through the installation process.
You may also want to check that you have a compatible smartphone or tablet to use with the blink outdoor camera.
Prepare The Mounting Location
Now that the wi-fi connection and smartphone or tablet are ready, it’s time to prepare the location where you want to install the blink outdoor camera. Before installing the camera, ensure that you have the right tools required. The tools needed can vary depending on your installation site but might include:
- A ladder or step stool to reach high areas.
- A measuring tape, a pencil or a marker to mark position accuracy.
- A soft cloth or microfiber towel to clean the camera after installation.
Make sure you have the right mounting option. You can use double-sided adhesive tape or mounts, or suction cups that are included in the package.
Finally, clean the installation surface, making sure that it’s free of dust and dirt. Once you have everything in place, you are all set to install the blink outdoor camera quickly and efficiently.
Installing the blink outdoor camera is a breeze, with no screws required, and can be completed in a few simple steps. Preparing and getting everything in place before beginning the installation process is essential to ensure a seamless experience. With the above guidelines, you can install the blink outdoor camera without issues and enjoy its security benefits.
Installing Your Blink Outdoor Camera
Installing your blink outdoor camera can seem daunting, especially if you aren’t familiar with the process. Thankfully, with these easy-to-follow steps, you can install your blink outdoor camera without screws in no time.
Download And Set Up The Blink App
To install your blink outdoor camera, you’ll first need to download and set up the blink app. Here’s how:
- Download the blink app on your smartphone or tablet.
- Launch the app and follow the instructions to create an account.
- Once you’ve set up your account, navigate to the setup device section.
- Follow the prompts to set up your camera.
Add Your Blink Outdoor Camera To Your Account
To add your blink outdoor camera to your blink account, follow these simple steps:
- Open the blink app and log in.
- Click on the ‘add a blink camera’ button.
- Choose blink outdoor camera from the list.
- Scan the qr code on the camera’s base or manually enter the serial number.
- Choose a location for your camera and enter a name for it.
- Confirm that the blue light on the camera is blinking.
Install The Sync Module
Before you can use your blink outdoor camera, you’ll need to install the sync module:
- Plug the sync module into a power outlet near your router.
- Connect the sync module to your router using an ethernet cable.
- Wait for the led light on the sync module to turn solid green. This process can take a few minutes.
Attach The Camera Mount Securely
Last but not least, you’ll need to attach the camera mount securely:
- Choose a location for your camera and attach the mount using the adhesive strip.
- Once the mount is attached, clip the camera onto the mount.
- Position the camera as desired and tighten the screw on the bottom to secure it in place.
Wrapping Up
By following these easy steps, you can install your blink outdoor camera without screws. Remember to connect the sync module, add your camera to your blink account, download the blink app, and attach your camera mount securely. With these simple steps, you’ll have your blink outdoor camera up and running in no time.
Troubleshooting Common Problems
Blink outdoor camera is an excellent security solution for your home. It offers a wide range of features that keep your property secure and alert you of any unusual activities. However, problems might arise during the installation process that requires troubleshooting.
In this section of the blog post, we will address some of the common issues users face while installing blink outdoor camera without screws and how to fix them.
Camera Not Syncing With The App
If the blink outdoor camera is not syncing with the app, here are some key points to consider:
- Check the wi-fi connection as it might be weak or lost. Restart the wi-fi router and ensure that it is working correctly.
- Ensure that the blink camera is in pairing mode, and the blue light is flashing during installation. If not, press and hold the button for 7 seconds to reset the camera and start again.
- Confirm that the blink mobile app is updated to the latest version. If not, update it from the google play or apple store.
- Verify that the email address and password are correct, and the camera is added to the app. If not, remove and add the camera again.
Poor Image Quality
If you experience poor image quality on your blink outdoor camera, consider the following;
- Ensure that the camera is placed within the wi-fi range to receive a strong, stable connection.
- Clear any obstruction around the camera lens that might affect the image quality.
- Confirm that the camera lens is clean by wiping it with a soft cloth. Dust and dirt can distort the image and reduce its quality.
- Review the camera settings and adjust the video resolution from low to high. High resolution requires a stronger wi-fi connection than lower resolution.
Device Not Responding To Commands
If the blink outdoor camera is not responding to commands from the app, consider doing the following:
- Reboot the camera by unplugging it from the power source and plugging it back.
- Check if the blink camera is within the wi-fi range. If not, move it within range or install an extender to amplify the signal range.
- Check that there are no app updates that need to be installed. If not, update the app to the latest version.
- Remove and install the camera again if none of the above solutions work.
These are some of the common issues you might face while installing blink outdoor camera without screws. If none of the above suggestions solve the problem, we recommend you contact blink customer support for further assistance.
Frequently Asked Questions On How To Install Blink Outdoor Camera Without Screws
How Do You Set Up Blink Outdoor Camera Without Screws?
To set up your blink outdoor camera without screws, remove the back cover and insert the provided lithium batteries. Then, connect your camera to the blink app and mount it using the provided mounting bracket.
Can You Use Double-Sided Tape To Install The Blink Outdoor Camera?
Yes, you can use double-sided tape to install your blink outdoor camera. Peel and stick your camera to any flat surface, such as a wall or ceiling. Just make sure the surface is clean and dry before mounting.
How Long Does The Battery Last On A Blink Outdoor Camera?
The battery life of blink outdoor camera can last up to two years, depending on usage. You can check the battery level from the blink app and replace it when needed.
Can I Still Access My Blink Outdoor Camera Footage If My Wi-Fi Goes Out?
No, if your wi-fi goes out, you won’t be able to access your blink outdoor camera footage remotely. However, your camera will still record any motion detected and you can view the footage when your wi-fi connection comes back online.
What Is The Range Of Blink Outdoor Camera?
The range of blink outdoor camera is up to 100 feet from the sync module. In open spaces, the range may extend up to 300 feet. However, obstacles such as walls and interference from other electronic devices may affect the range.
Conclusion
As you can see, installing blink outdoor camera without screws is a straightforward process that anyone can do without any professional assistance. You just need to follow these simple steps and ensure that you have all the necessary tools at hand.
This convenient method eliminates the need to drill holes in your walls, making it ideal for renters or anyone who doesn’t want to cause permanent damage to their property. Whether it’s securing the perimeter of your house, monitoring your pets, or keeping an eye on your front porch, blink outdoor camera offers a reliable and hassle-free solution.
With this guide, you can enjoy the benefits of a security camera system without the headache of installation complications. Try it out and see for yourself how easy it is to protect your home 24/7.
Click Here For More Articles: